Photo 1
The first photo shows the outside view of the door handle style which this Jimmi' Jammer kit will fit. Your handle should look similar to this. If not, check our other tutorials for a handle that resembles yours. (Color, chrome, etc. don't count as differences, only shape and size.)
Note: This tutorial was done on a 2007 Avalanche. Some variation may exist on other full size GM trucks, but this will give you a good idea on what to look for during your installation. If you find differences on your vehicle, please email us a photo and description and we'll include it on this tutorial.
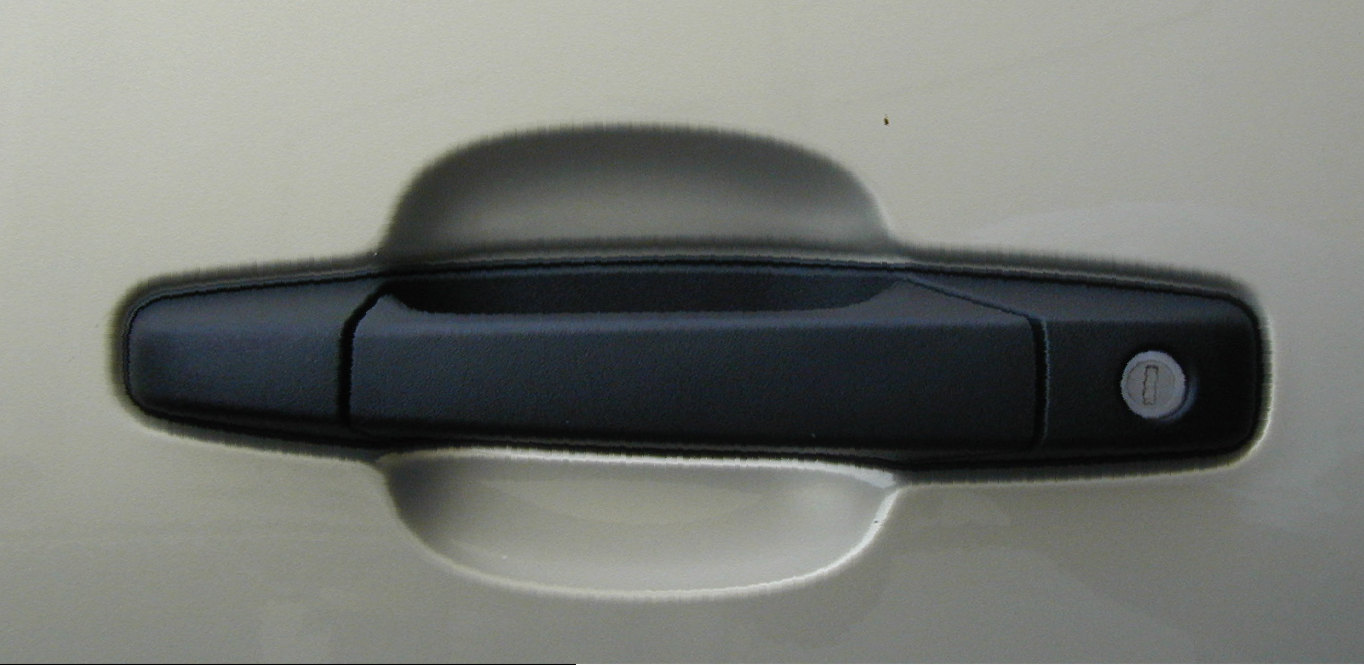
Photo 1
Photo 2 shows the inside door panel on the drivers side. Find the following pieces in the photo and on your door.
- Inside door handle shroud.
- Triangle shaped trim at top inside corner of panel.
- Door lock knob shroud
- Electric switch panel
Each of these pieces is held onto the panel with snaps and/or screw(s). Work carefully to avoid damaging trim pieces.
If your door panel looks different than the one pictured here, try our other tutorial here.
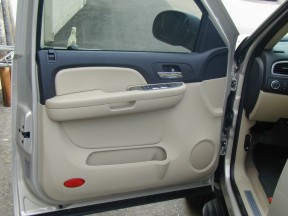
Photo 2
Photo 3
This photo shows the inside door handle and shroud. Remove the screw seen near the center of this picture. On some models it may be hidden behind a snap off cover.
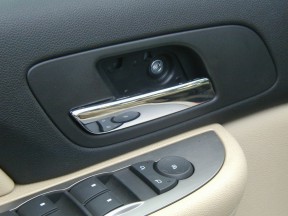
Photo 3
Photos 4
There may be one or two screws behind the arm rest pull grip. Remove them. There may be a cover hiding the screw on some models.
Photo 4a
This shows the passenger side on this vehicle. Remove the snap off cover from behind the arm rest to access the screw(s).
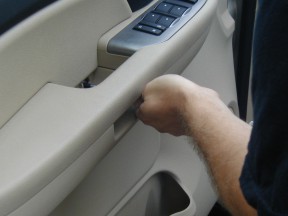
Photo 4
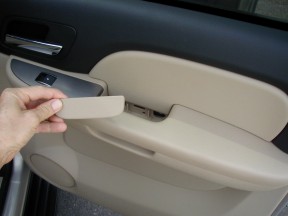
Photo 4a
Photo 5
Photo 5 shows the backside of the triangle shaped trim panel at the upper inside corner of the door, above the door panel. This piece usually snaps off the frame by pulling straight out on the trim piece. Try to look behind the trim piece before pulling to find the location of the snap clip. Shown here popping the clip out with a trim panel tool. A flat screwdriver and small block will work if you don't have a panel tool.
This plastic clip is somewhat fragile, so try to pull out as straight as possible.
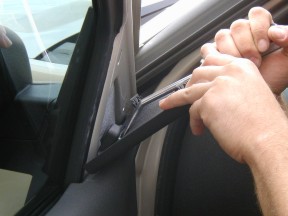
Photo 5
Photo 6
Remove the small snap on the front side of the lock pull knob. This will allow removal of the plastic knob by pulling it upward.
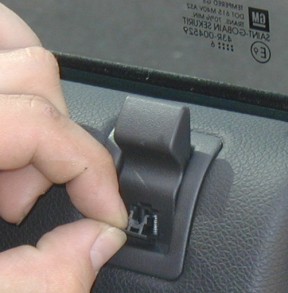
Photo 6
Photo 7
Start at the lower outside corner of the door and pry the panel away from the door metal far enough to peek in and see the panel clip locations. Use your long screwdriver with a small block for a fulcrum and pop the clips straight out from the door metal. Work your way around the panel until all clips are out and the panel can be moved around.

Photo 7
Photo 8
Pull the panel away from the door far enough to see the wires and cables connected to the switch panel and door handle pull.
If you have the electric windows and locks, disconnect the wires that go to the switch panel. Watch for locking tabs on the connectors, there is usually one on each connector. Release the locking tab with a small screwdriver, or your fingers if possible, and pull the connector out of it's mating piece. Work carefully here and don't use too much force.When the locking tab is properly released, the connectors should release relatively easily.
Also check to see if there is a wire to a courtesy lamp on the lower corner of the panel. If so, disconnect it from the panel. There is usually a snap clip on the bulb holder that allows the lamp to be removed from the panel.
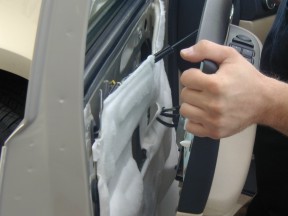
Photo 8
Photos 9 and 9a
Release the door handle pull cable from the panel. There are usually little "wings" or clips on the cable housing end as shown in photo 9a. Squeeze these to get the cable out of the holder.
Once the cable is off the panel, the door panel should pull away from the door. Place the panel in a safe place so it doesn't get scuffed or dirty.
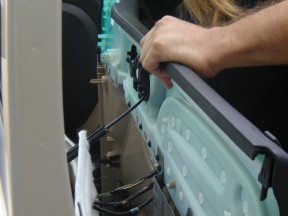
Photo 9
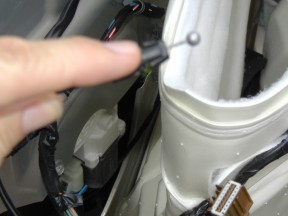
Photo 9a
Photo 10
Peel back the splash guard far enough to gain access to the large access hole on the door metal. It is easiest to fold the guard back rather than remove it. You can tape it back or lean something against it to keep it from flopping back into place while you work.

Photo 10
Photo 11
This photo shows the inside of the door before the plate is installed. The lock cylinder back end and the lock pawl and rod are shown. (The lock pawl is the red piece and the rod goes through it. Passenger side door is shown in this photo.)
You will need to disconnect the lock rod from the pawl. The lock pawl end has a slot that the rod snaps through. To get the rod out, a nail or shaft of a small screwdriver can be pressed into the slot to fold the holding tabs up, allowing the rod to snap out as you pull the nail or screwdriver out.
If the door is too crowded for this, you may be able to remove the two nuts holding the handle in the door and pull the handle out of the door far enough to easily get at the rod. The handle pull rod can stay connected.
Once the rod is disconnected, and the handle nut nearest the lock cylinder is removed, you can maneuver the plate into place. The hole in the middle area of the plate fits snugly around the lock cylinder holder, and the small hole goes over the handle stud.
With the plate in place, put the nut back on the handle and snug it up.
Photo 12 below shows the plate in place.
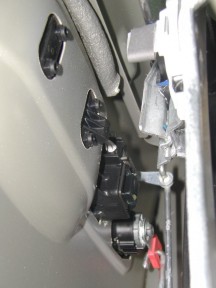
Photo 11
Photo 12
This photo shows the Jimmi' Jammer® plate in place inside the door.
Once the plate is in place, and the mounting bolt is tightened down, thread the set screw on the edge of the plate toward the door jamb metal.
The set screw doesn't go through the door metal. Instead, it just pushes up against the door jamb to provide extra strength should a thief start pushing from outside.
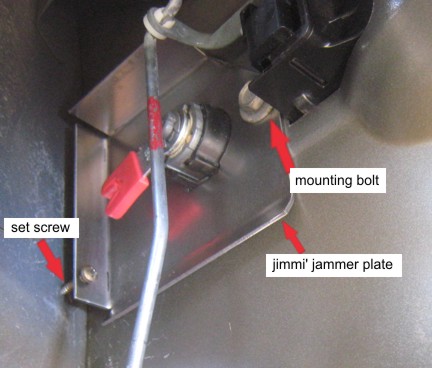
Photo 12
Passenger side door
Your Jimmi' Jammer® kit will come with a plate for each front door. The plates will be marked for the door they fit. If your truck has a lock on each front door handle, the passenger side is the mirror image of the drivers door.
If your truck has a lock cylinder only on the drivers door, put the provided passenger side plate in the passenger door anyway. There are other lock rods inside the door besides the lock cylinder that are vulnerable to attack. The passenger door is easier to do since there is no lock to work around.
Photos 13 and 13a
Photo 13 shows the inside of the passenger door. Note the big hole where the lock would be. This hole could allow a thief to force a screwdriver through the hole and possibly get to the latch assembly or the manual lock rod with a hanger or wire.
Photo 13a shows the plate in place covering the hole. Although it may be difficult to break in through this door, better safe than sorry!
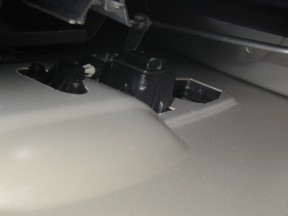
Photo 13
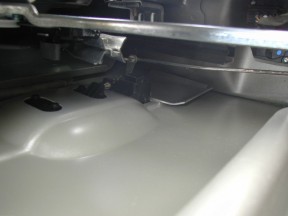
Photo 13a
Very Important:
Test the lock operation before putting the door back together.
This completes the installation. You can put the door back together and put the window label on the window.
If you don't have protection on your tailgate, please check out our Gate Keeper® product. It may save you the $1000 expense of buying a new tailgate!
Has your lock been ruined by a thief? If you're sick of replacing lock cylinders, try our PunchPlug™ product.
Not crazy about the idea of removing the door lock cylinder altogether? Then how about covering it as a visual deterrent? Check out our LockCap™ product.